


Selenium is considered as the hammer and chisel of any automation engineer. Even though new javascript based approaches have come in the market, selenium still remains as the undisputed solution. We are also seeing an unprecedented growth in the domain of voice based technologies. What if we could harness the power of such technologies to drive Selenium? Well, this article is just for that! This article discusses the architecture and programming behind such a combination.
Architecture
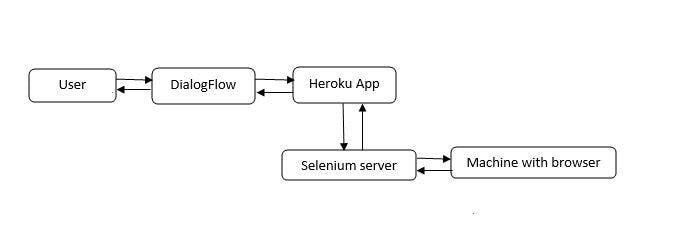
First, we will create a voice model in dialogFlow and the fulfillment of that voice service will be handled by our node.js application hosted in Heroku via a web URL. The heroku app will then communicate with a selenium server for carrying out the web automation. Therefore, the major components facilitating the interaction between the user and the target machine having the browser are communication model in DialogFlow, application hosted in Heroku and the Selenium server. Lets get to the implementation of each of these components in detail.
DialogFlow setup
Open an account in DialogFlow and create a new agent named webAutomator. Create 3 intents named open_url_in_browser, operation and close_browser. Configure each intent as detailed below. For more details on the dialogflow conversation model, please refer the dialog flow help documents.
Open_url_in_browser:
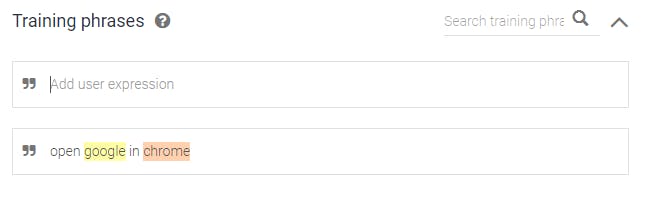
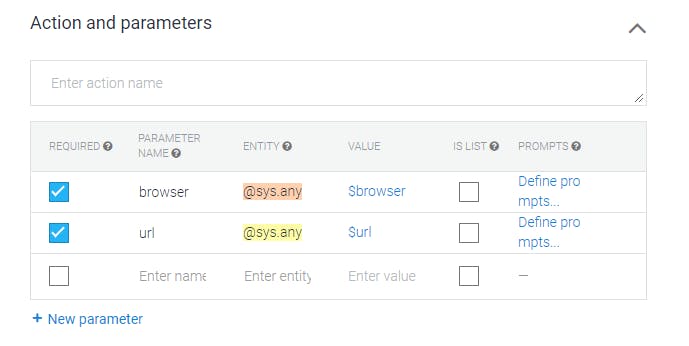
Provide a training phrase as “open google in chrome” with the words “google” and “chrome” mapped as values to the parameters “url” and “browser” respectively. When the user voices out his request as "open google in chrome", DialogFlow will convert this voice query into a JSON request containing the parameters along with their values as key-value pairs as {url: google, browser: chrome} and send this request to our node application (to be deployed as heroku app). The heroku app contains a selenium program which will use the parameter values received from the JSON request and drive the selenium server to open google in chrome browser in the target machine.
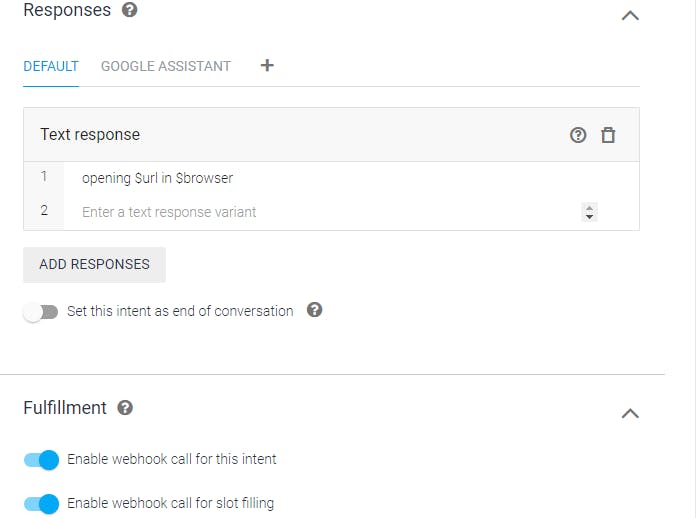
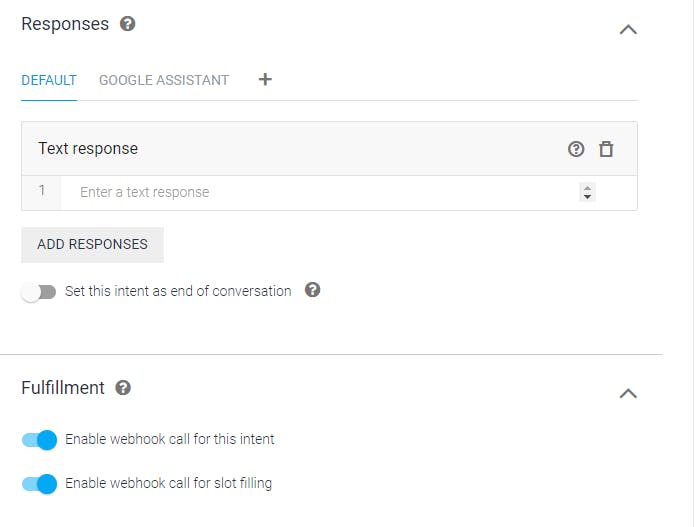
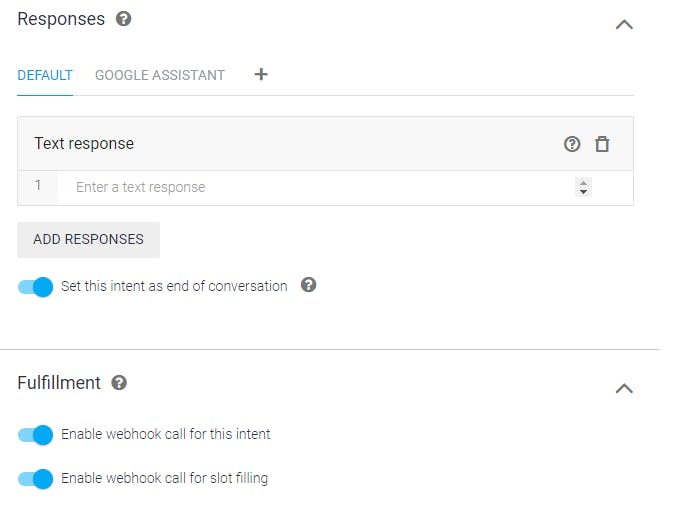
Provide a text response as well which will be played back to the user once the request is successfully parsed by our heroku app. Toggle both the toggle bars in the fulfillment section which denotes the agent that the fulfillment will be carried out by a webhook (URL to the heroku app).
operation:
This intent will carry out the operations in the browser opened when the open_url_in_browser intent gets executed. Provide two training phrases with the below mentioned details.
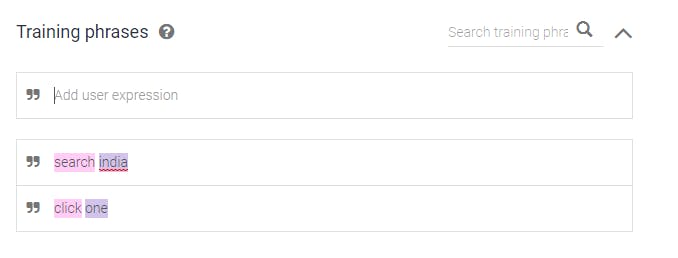
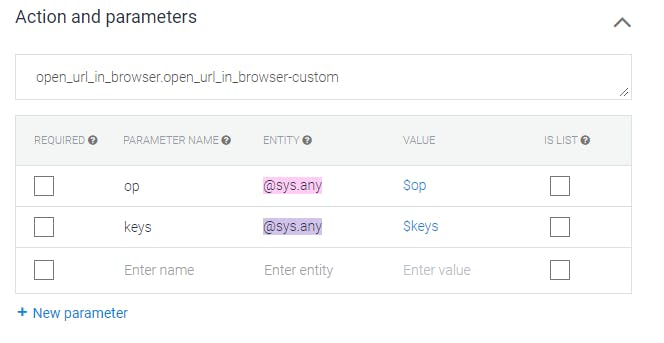
When the user executes this intent by saying “search india” or “click one”, a JSON request, containing the key-value pairs extracted from the voice query as {op: search,key:india}, will be sent to the application .
The “op” parameter value specifies which operation to perform and “keys” parameter value specifies what should be the argument to that operation on the browser.
Since, this intent also will be serviced by the webhook, the toggle bars need to be toggled in the fulfillment section.
close_browser:
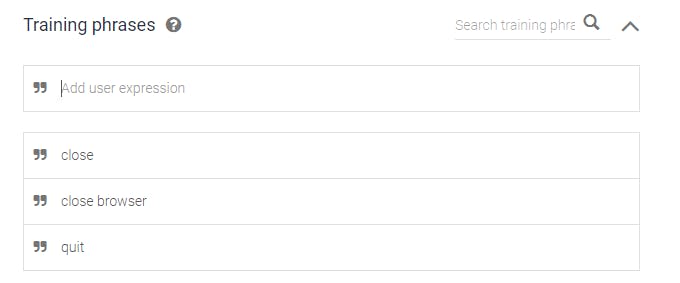
When the user says any of the phrases associated with the close_browser intent like “close”, “close browser”, etc, the close_browser intent will be invoked and the corresponding handler in the selenium application for closing the browser will get executed.
Notice that along with toggling on the options to enable webhook fulfillment, the toggle button named “Set this intent as end of the conversation” also needs to be enabled to denote the agent that this intent will mark the end of the conversation.
Now, we have designed the communication model for our project. We need to plug this model to the webhook.
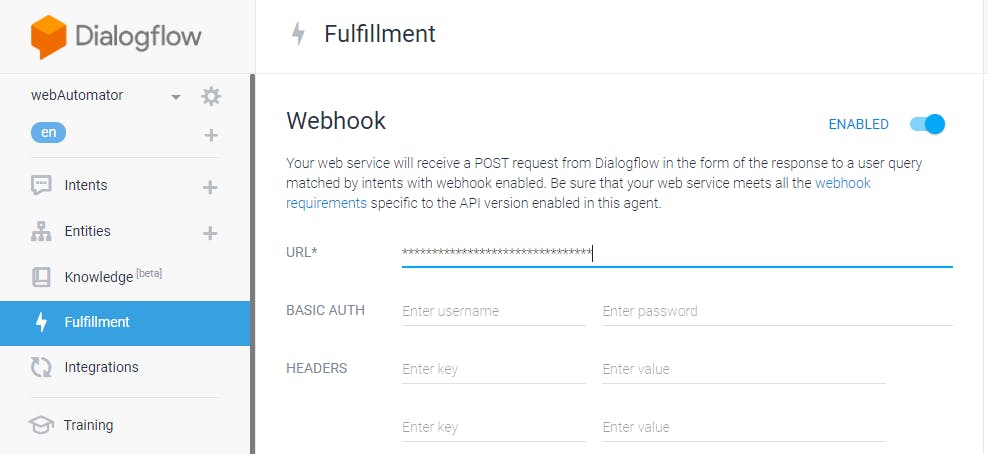
In the Fulfillments section, enable the option for WebHook and provide the URL to the webhook which will be used for fulfilling the requests from DialogFlow. We will be creating our webhook in the next part of this tutorial.
We have seen how to configure the conversation model for our voice controlled selenium project. In the next part, we will see how to program, deploy and test our node js selenium application to interact with this model.